
Ipad Set Up Guide For Multiple Devices
I am writing this as a guide that, is mostly for my own sanity than anything else really, and written for other ICT teachers who are starting out using iPads in their classrooms/ schools for the first time and, are cloning several iPads rather than gifting apps.
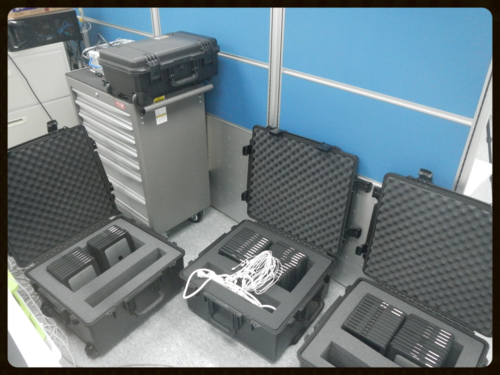
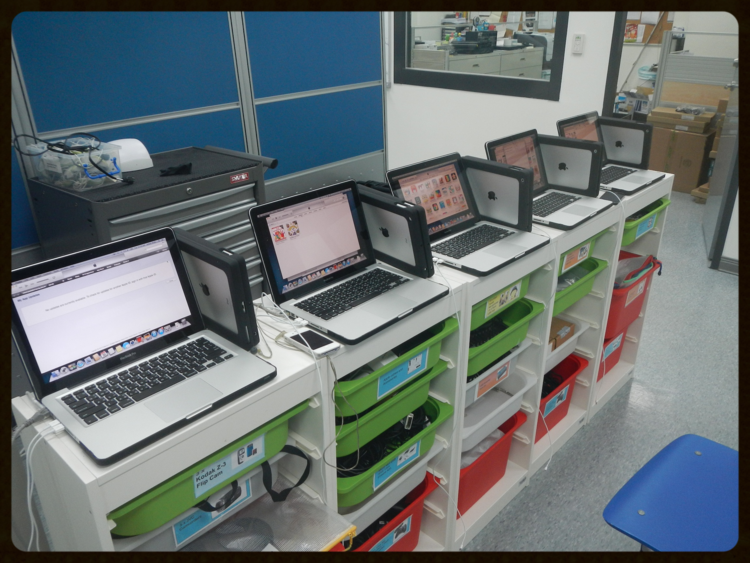
This is how they look in the end. Mac Airs included with VGA adaptors.
","engine":"visual"}" data-block-type="2" id="block-521bbcd4dd61aea5898f" style="position: relative; clear: none; z-index: 1; padding-left: 17px; padding-right: 17px; word-wrap: break-word; padding-bottom: 15px;">
When you're given a task to do with the iPads in your school you're sometimes overloaded with which direction to take especially if you're using them as we do like a class set of computers rather than individual, personal devices. Please be mindful that this isn't what they were designed for and as you see the images below there are obstacles that remind you of that very fact.
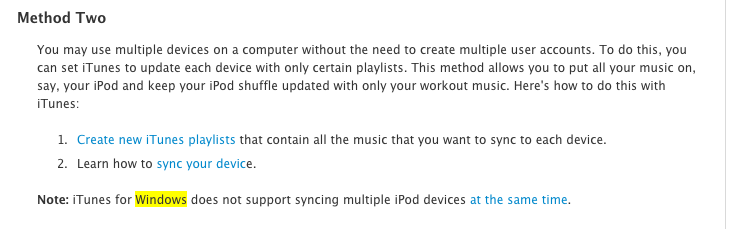
Cloning iPads or iPod touches isn't illegal. This note from Apple iTunes Support tells you that you can sync 10 devices to one account per authorised computer. If you read here you can see that iBooks is somewhat different. As too iCloud. If you have a home account for the iOS devices in your home then you obviously sync to that account. Your child, brother, sister, aunt, dog, cat, husband or wife all do the same. This amounts to a lot of copying of data and contacts (Can you see how useful that is for school? Not so handy for family though. I'm not sure your 14 year old child would want his/her contacts syncing to your iOS device!) to many devices on the same account. Is there a limit? Well, yes and no. I point this out below too. The limit we find is about 20 restores. Then it becomes a little sticky and we have to use more than one Mac to finish completely. Hence, below you see we use 5. I am not using Windows PCs with iTunes as you can't sync multiple devices at once with iTunes on Windows. See below from the Apple discussions board.
For those of you reading this and shouting "You should be using Apple Configurator! Why aren't you using Apple Configurator?" Well, I have, and to be honest you're kind of restricted to one Mac to do all the syncing. When we have to rush out the apps or as we're doing here a complete refresh it's quicker and easier to use iTunes. Also, the graphical nature of the Apps view in iTunes is omitted in Configurator meaning that the subject folders you need on all iPads can't created.
One last thing about Configurator is that we have run into problems installing apps en masse and then having to move them later from the devices while the students are using the iPads during lessons. This. in my opinion. is poor practice and I prefer to have them all singing all dancing for every lesson I teach them with. So, if you need to use a separate Mac to add an app or move, say, a .band archive from one iPad to another then you're stuck as Apple Configurator only allows you to hook up the iPads that you originally used on the other Mac ( I have tried with and without the switch at the beginning to 'un-restrict' the device but have run into numerous problems down the line later on). Going the route I'm outlining below is a little laborious to begin with but reaps dividends in being somewhat quite flexible.
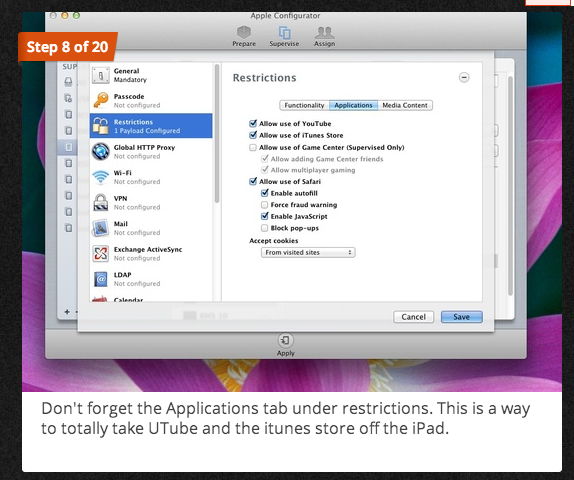
Configurator is a fantastic idea if you gift the apps to each device but if you're batching them like we do then it is very restrictive. Also, Configurator is about control of the device based on your policies. No YouTube in your school / LEA? You can switch it off for entire sets and email the app codes to students who, in their own time can move the App wherever they want it.
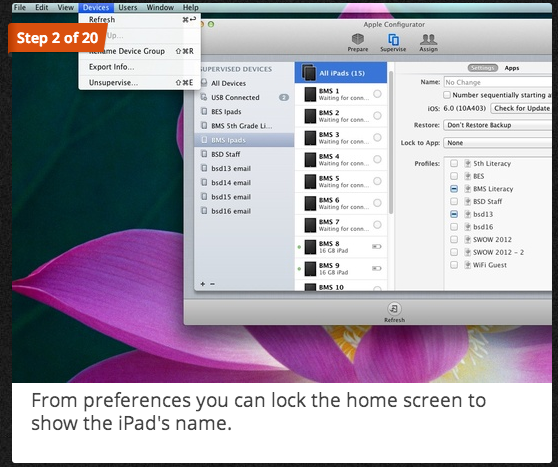
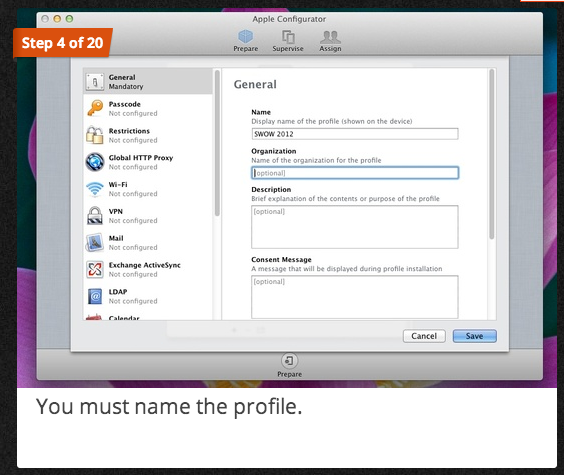
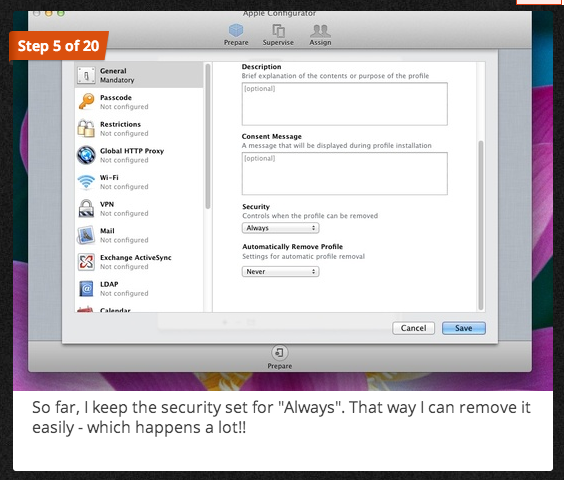
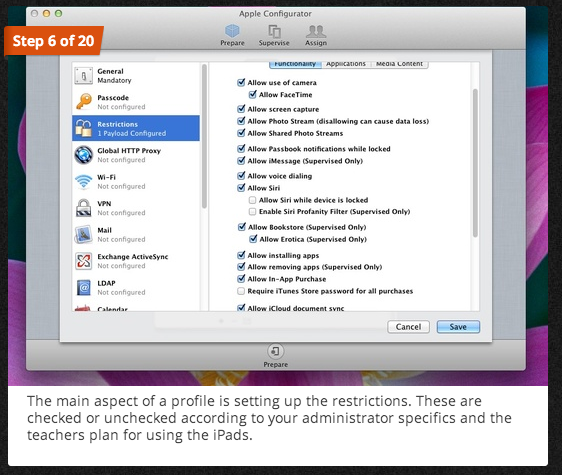
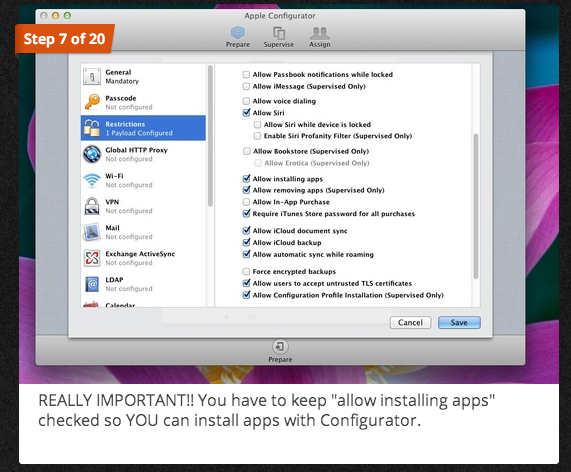
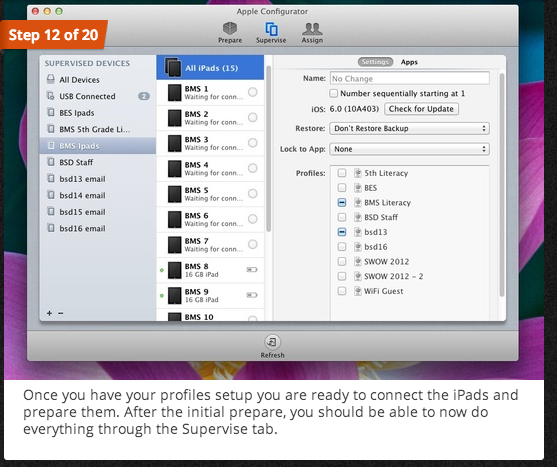
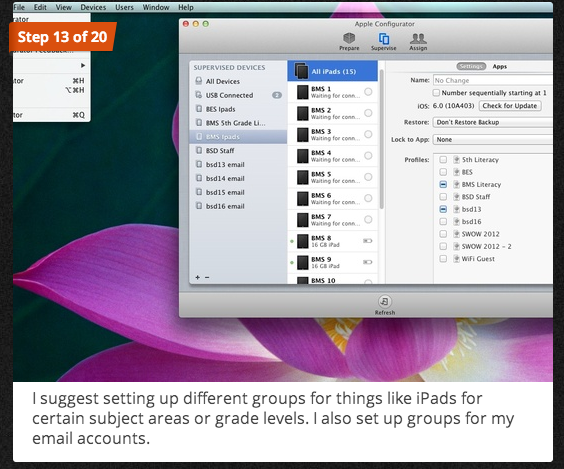
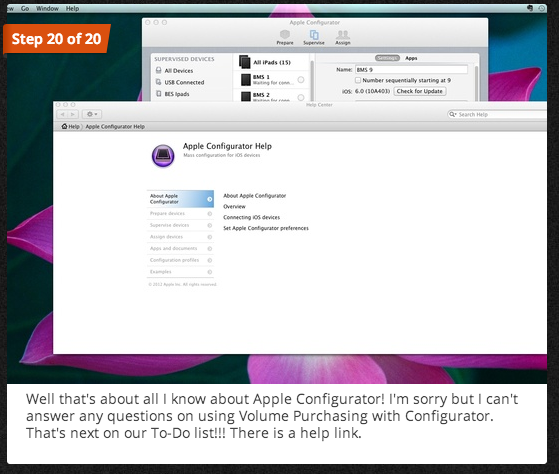
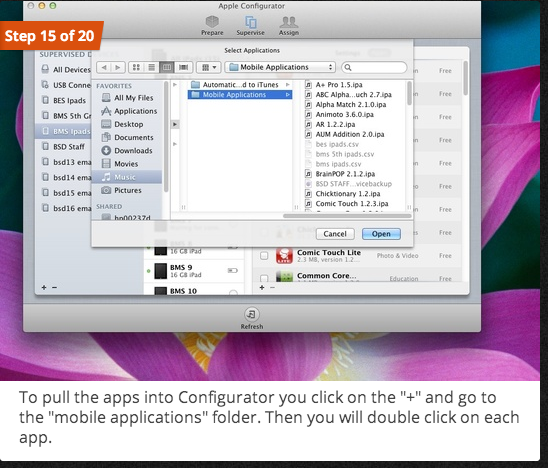
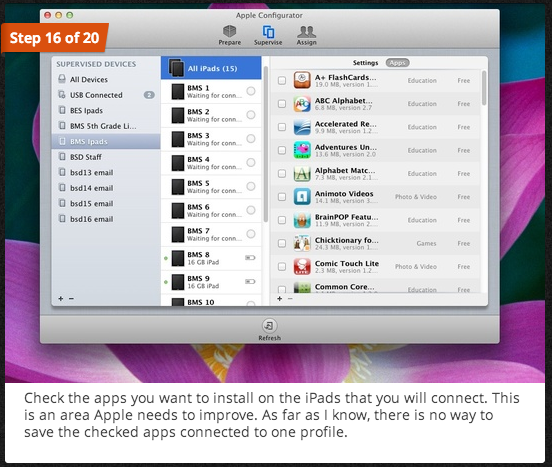
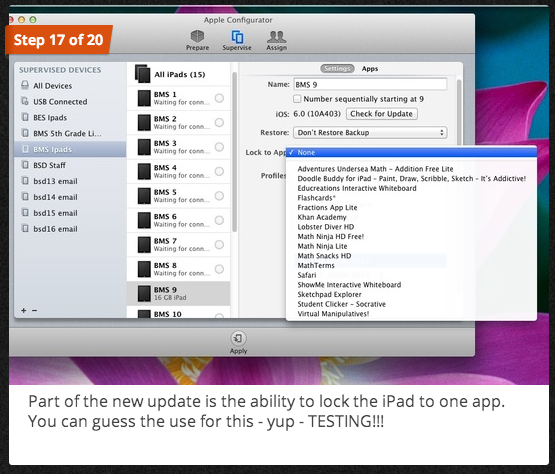
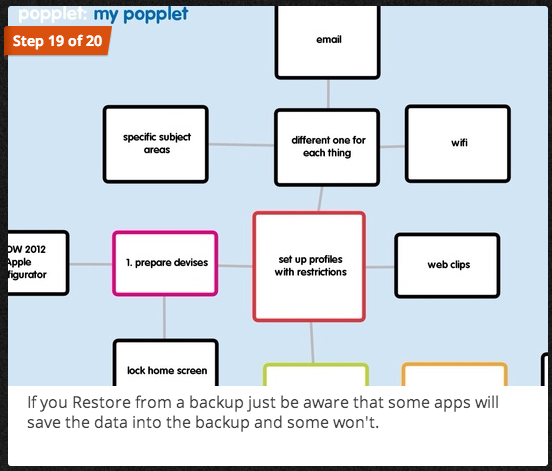
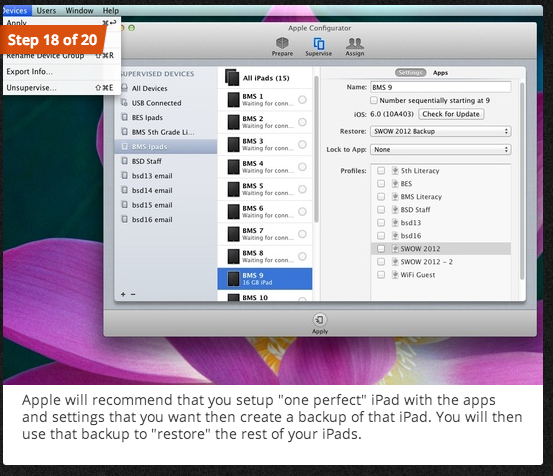
It's personal preference I suppose. You really need to run a test and find out what you like. Check this guide out. If you go to step 18 in the show below you'll see a graphic of what I'm talking about.
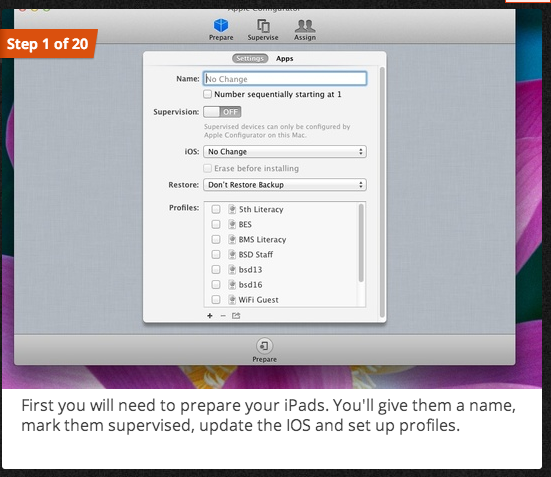


1. The initial Set Up.
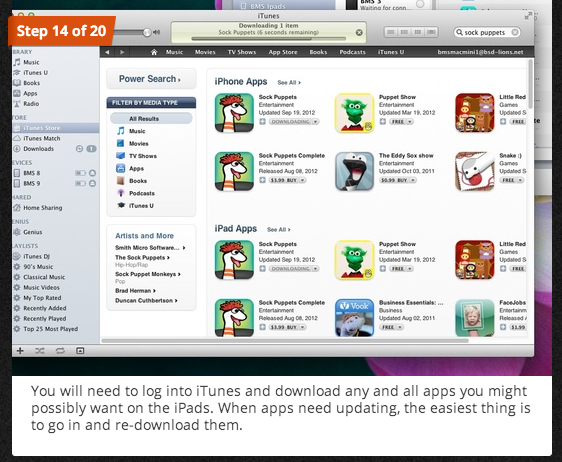
We do this in three major parts. The first being the the downloading and copying of all 'Purchased' Content from the iTunes store.
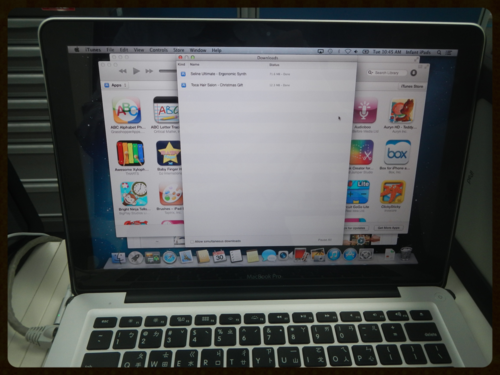
Setting downloads to single only.
Depending on how much you have purchased will depend on how long and how much bandwidth you're going to take up. If you have an IT manager at your school you need to make a decision on when to do this. It took all day plus the following morning (due to timing out of connections ) for us to sort out 5 Macs (our allotted authorisations) downloading approximately 10Gbs of data to each laptop.
We had already planned for this and made sure the downloads in iTunes we we tosingle downloads only and not SIMULTANEOUS or else you could strangle your network. We also set this off at the end of school informing the IT Dept that this woSuld happen. Also, we set up as in the photo here, knowing that there would be a mix of wired and wireless connections. not only from this initial set up but also other users around the ICT rooms. So, with that in mind we moved an access point near to us so that we could control that inevitable dip in speed.
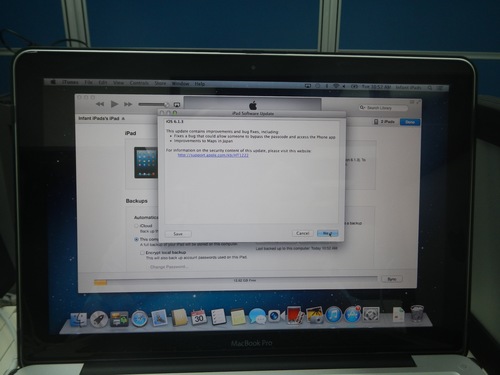
Updating isn't always necessary.
Updating the iPad isn't always necessary but in this case I decided to. You only really need to download the update once and it should unpack every time you plug in and accept the iPad to iTunes.

App arrangement
In iTunes plug in the first iPad and bring up the Apps window. This is where you need to arrange all the apps into the folders. We arrange them like this.
Once all the apps are arranged then you're good to go. What I tend to do now is back this up. Not because I like to do things twice, but because I have lost data so many times in the past that I know what a royal pain it is to have to do something again!
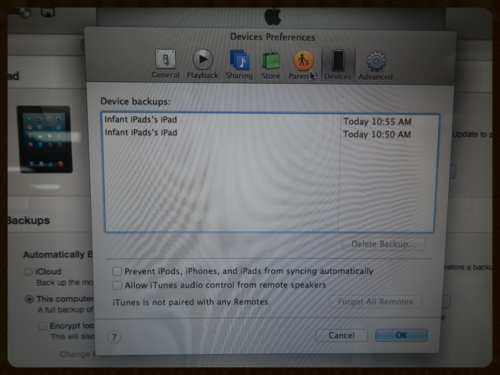
Delete all but one of your backups
A golden rule here: Only keep on back up as the live back up. Keep one iPad as the master clone for each machine you're backing up to (to save your 10 device per machine limit alive) and then delete any additional backups iTunes makes after that. Go to>> preferences> Devices and then delete the backup you don't want.
Here you can see that we wanted to keep the 10:50 AM version. Tick the box to prevent any more iPads/ iPods syncing to the computer automatically.
2. Backing up and Syncing

Once you're satisfied with the shape of the front page of the iPads and all the Apps are int he correct order etc. The transfer of all the apps are done.
I tend to make sure this back up is all singing all dancing. Back up. Check. Back up again.
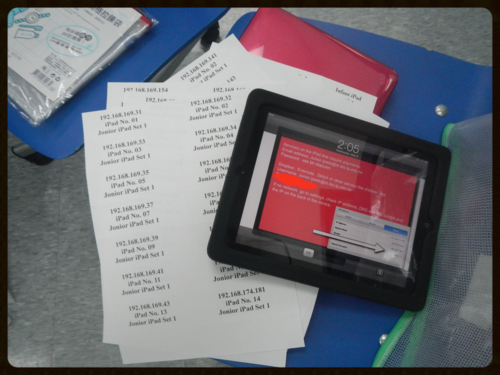
Make a list of all the things you think you'll need: Passwords, usernames, IP adresses, settings such as restrictions, in-app purchases, restricted content etc.
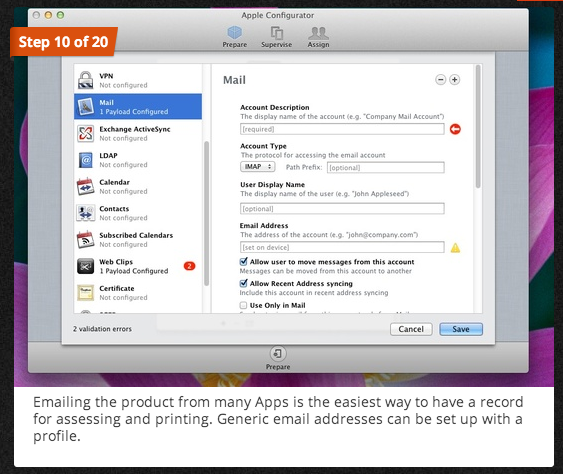
Don't forget the App store, Auto Download of purchases, iMessage, iCloud and email accounts.

And the saviour of all saviours: The ShortCut menus. I set up all kinds of shortcuts like email addresses, home pages, and passwords that students use frequently.
Then I back up again so that all the information you have put into the device will be saved.
Then I clone to all the machines ready for the first batch and check-up.
3. Cloning
iTunes will allow two back ups happening at the same time.
Therefore if you have more than one Mac handy, and you're cloning more than one device then I would recommend this kind of arrangement. Obviously, it depends on what you want and how many devices you're setting up.
Lastly, badge them up both front and back.
Lastly, as you're backing up. Pop into the Mac and turn on sync images. This wil allow you to put some helpful hints on the Lock Screen.
I tend to put the email addresses and the passwords we use for student accounts plus a little hint as to the most frequent issues: Network.
This network help is put on the back too as a sticker giving a number and IP address. Year 6 children then take care of this and make sure there are screenshots of this in the camera roll (iCloud photo folder) too.
There are lots of little niggles that crop up but mostly these are the steps I go through. There are many laborious parts as well. For example get help when, at the end and you're labelling the iPads and you're inputting the the IP addresses. This will drive you insane. If you notice that your Subnet, Gateway and DNS are not there then re-back up and sync. It will save you a lot of typing.
If you notice that any small part is missing then back up and re-sync.
Lastly, hand over any of these jobs to students and staff and have your team of gurus to support you. I find people like to be involved and take ownership of the devices. Especially the kids.
 technology, Operating Systems, apple, ed tech, iPad, resources
Reader Comments